ThunderAuto Trajectories
A ThunderAuto Trajectory defines a path for the robot to follow on the field.
ThunderAuto Trajectories consist of three main components:
Creating a New Trajectory
To create a new trajectory, click the + New Trajectory button in the Trajectories panel and enter your desired trajectory name in the popup dialog.
Trajectory Components
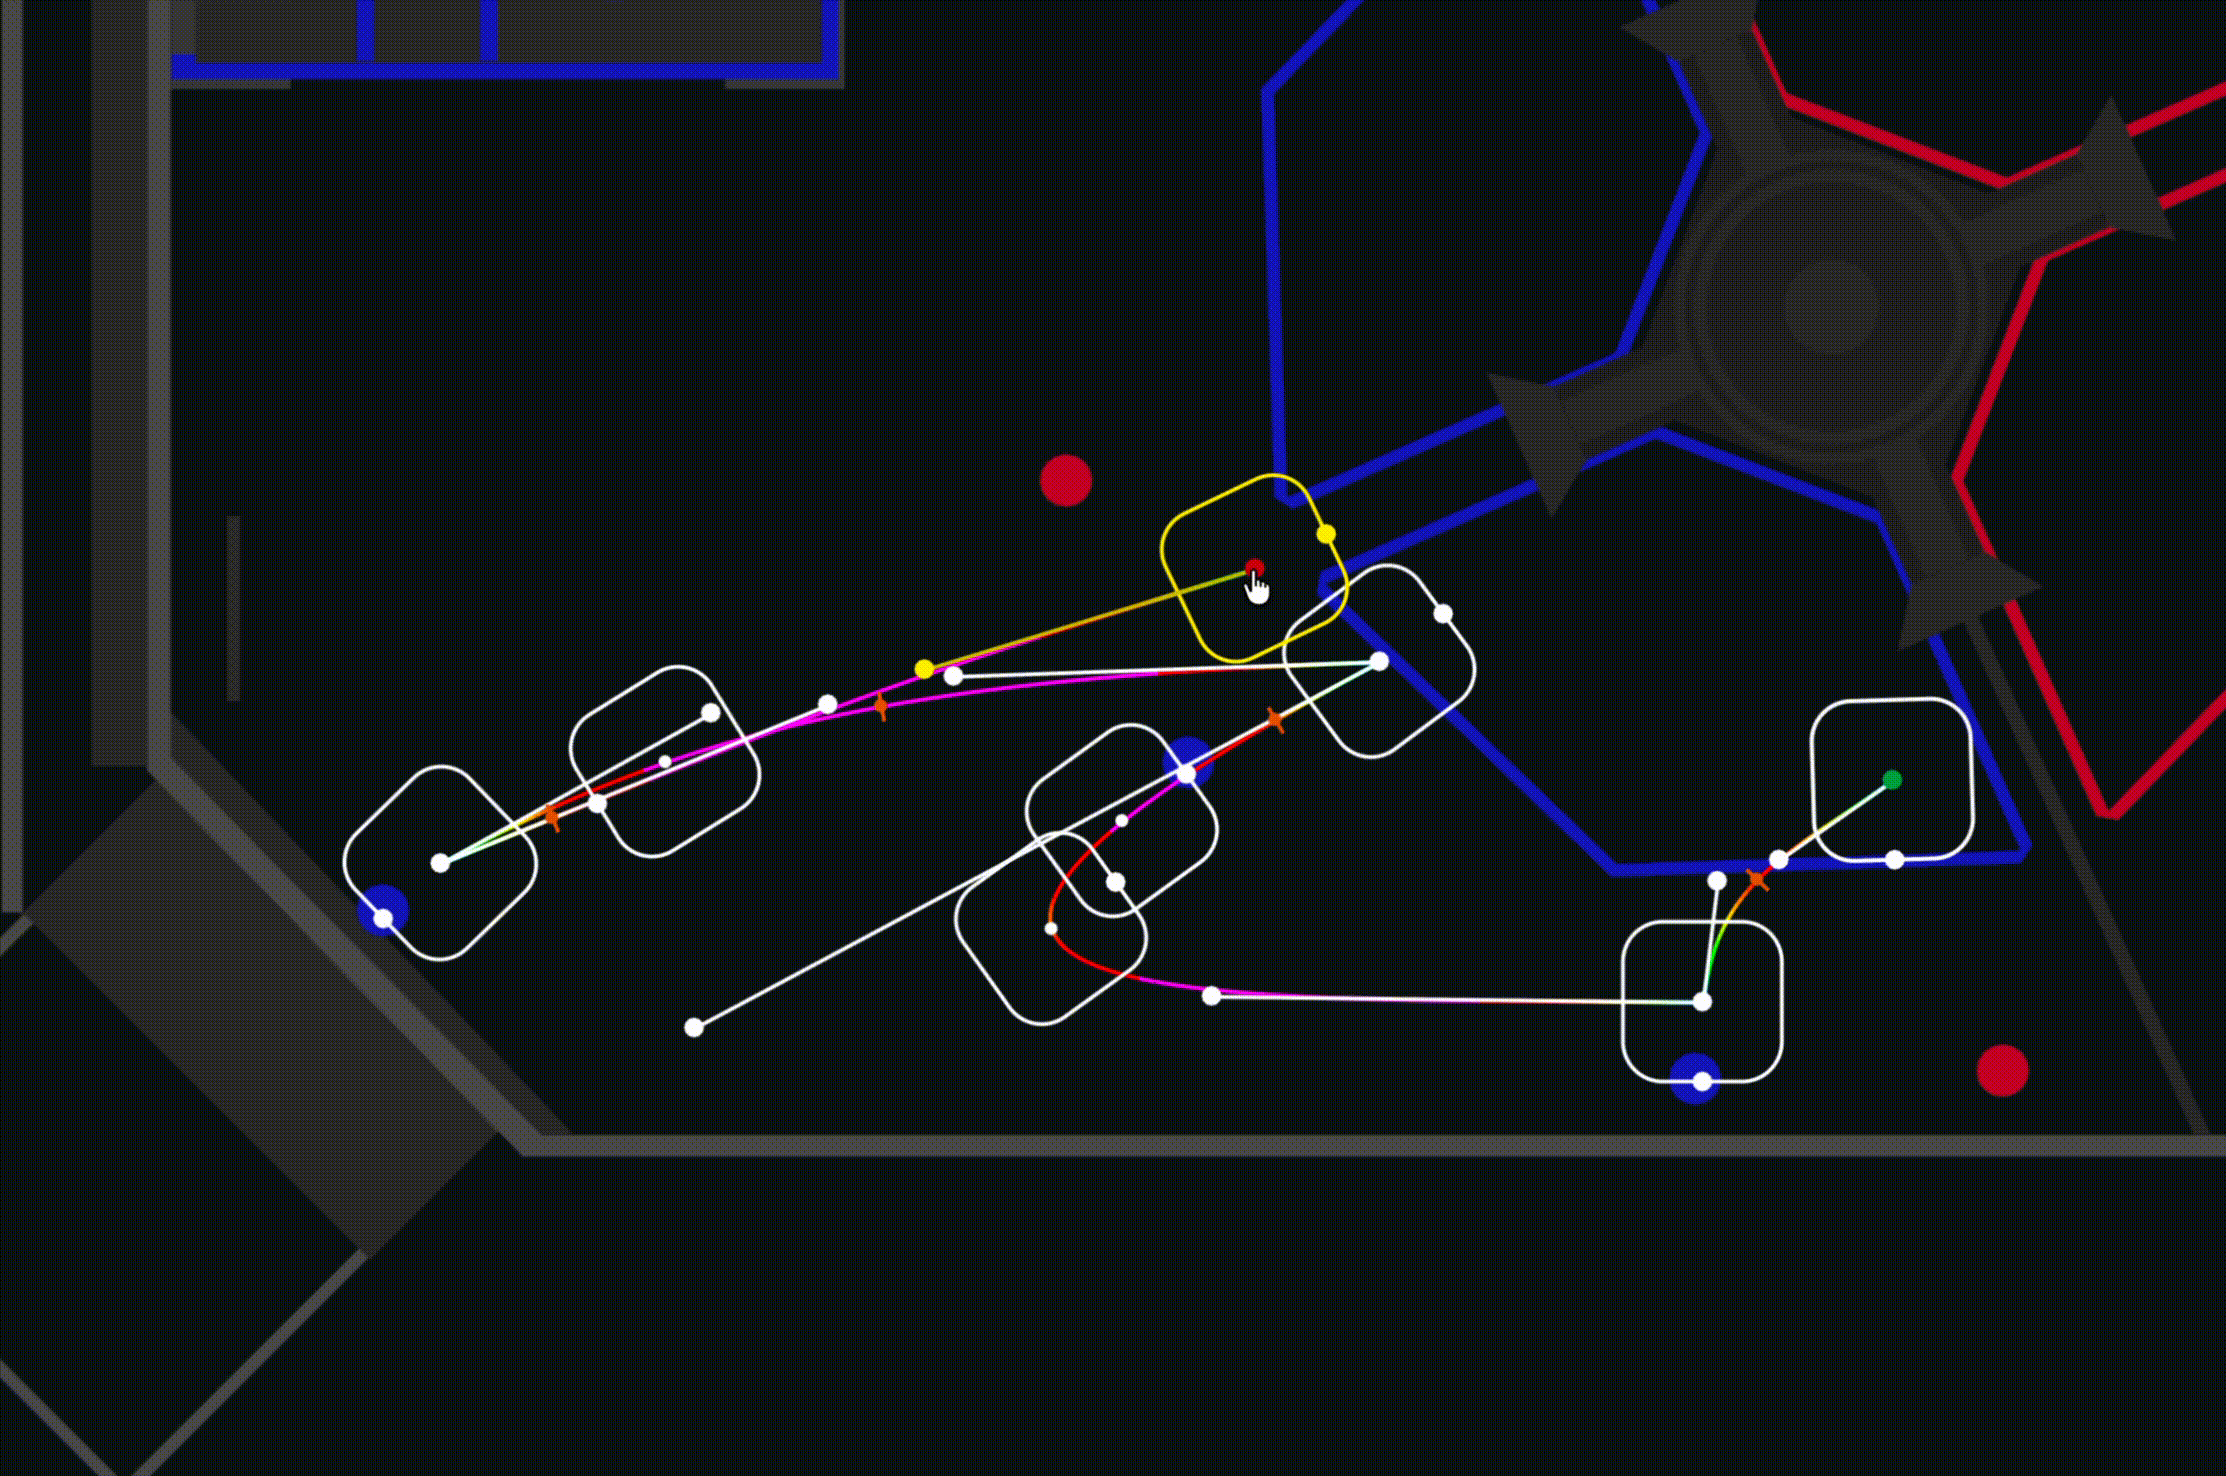
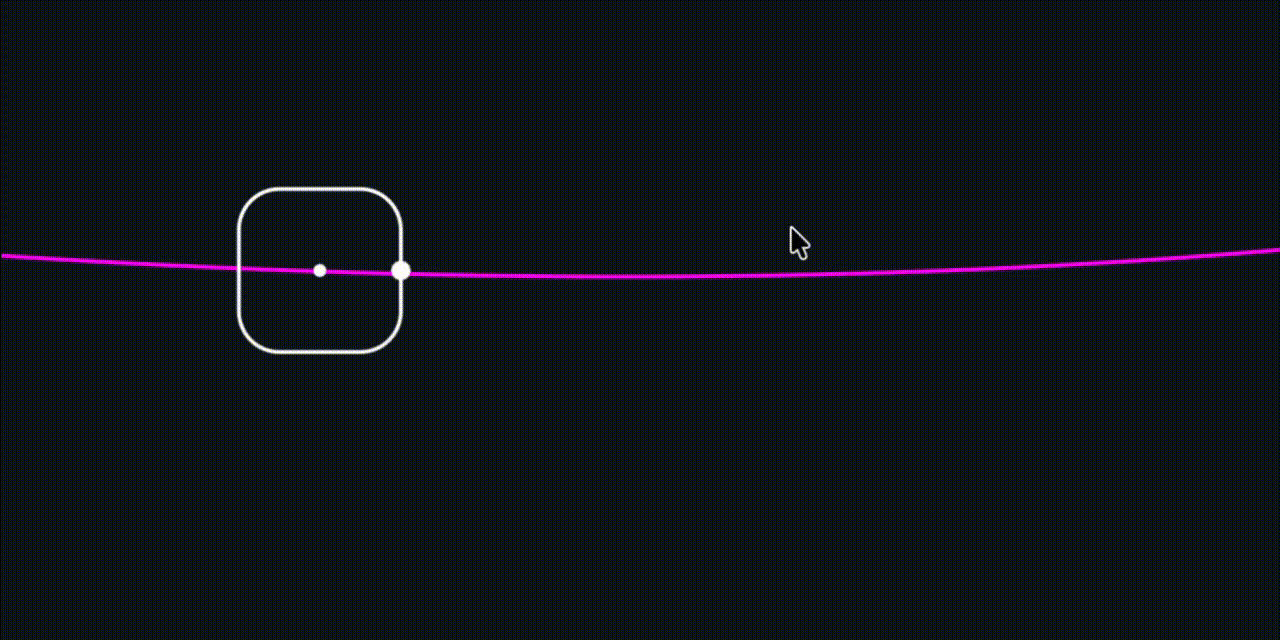
Points

Points define the path of the trajectory. Points have position (X, Y) coordinates on the field, as well as incoming and outging heading and weight values for shaping the trajectory.
Points can be added to a trajectory by double-clicking the field in the editor, or by right-clicking the field and selecting Insert Point Here.
You can drag points around in the editor, or adjust their values manually in the Properties panel.
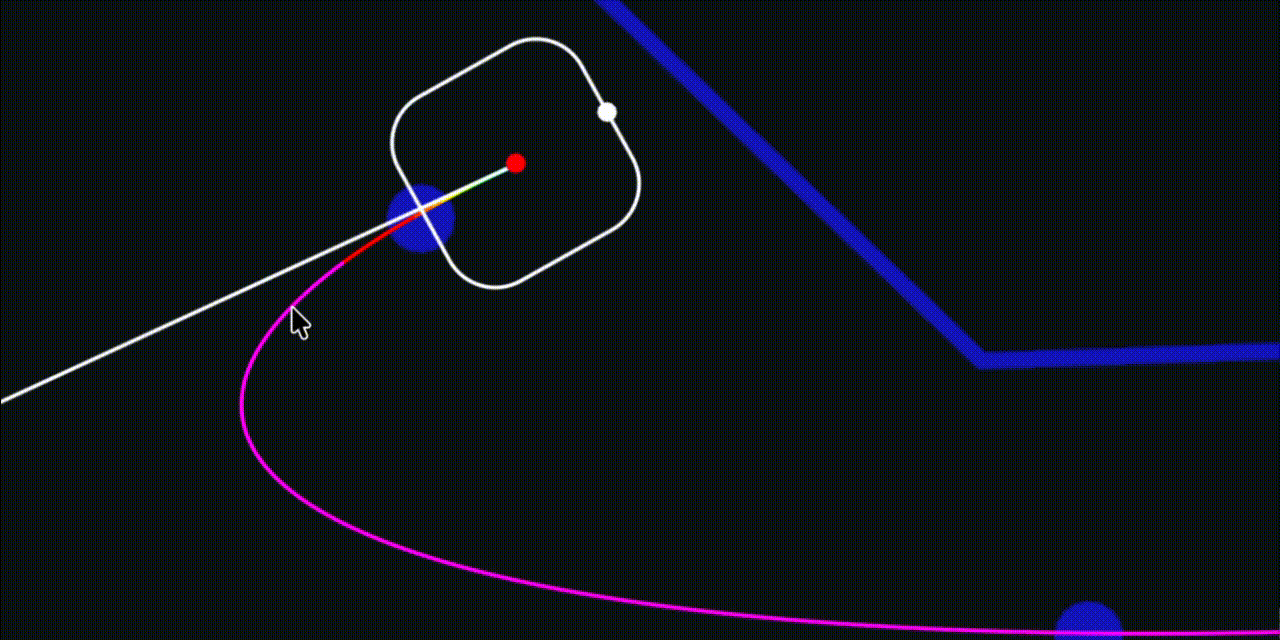
Rotation Targets
Rotation Targets define the robot's orientation at specific points along the trajectory.
Rotation Targets can be added by right-clicking the trajectory in the editor and selecting Add Rotation Target Here.
You can drag Rotation Targets along the trajectory and adjust their rotations in the editor, or adjust their values manually in the Properties panel.
Action Markers
Action Markers define positions along the trajectory where specific actions should be performed. See the Actions section for information about defining actions.
Action Markers can be added by right-clicking the trajectory in the editor and selecting Add Action Here, then selecting the desired action from the list. You must first define actions in the Actions panel before they will appear in this list.
You can drag Action markers along the trajectory in the editor, or adjust their values manually in the Properties panel.
Trajectory Velocity/Acceleration Constraints
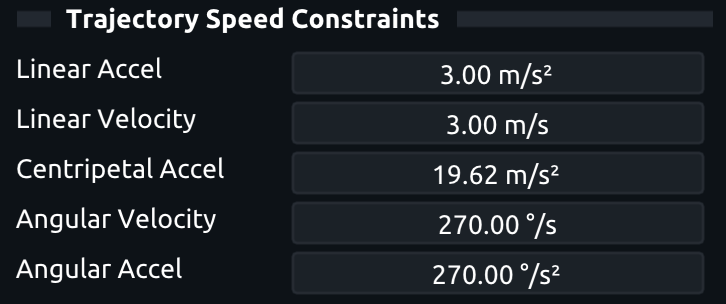
In the Properties panel under the Trajectory Speed Constraints section, you can set maximum linear velocity/acceleration, centripetal acceleration, and angular velocity/acceleration constraints for the trajectory.
ThunderAuto will guarantee that these constraints are not exceeded at any point along the trajectory.
Advanced Trajectory Editing
Overriding Point Velocities
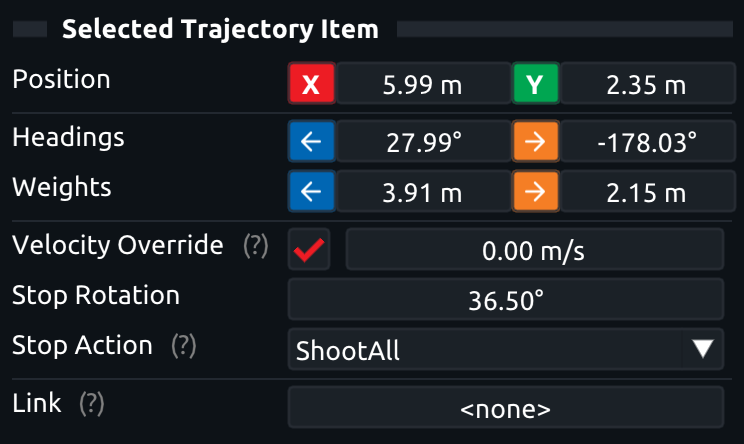
In the Properties panel for a trajectory point, you can override the maximum velocity at that point to be lower than the configured maximum velocity for the trajectory. This property can be useful for slowing down when approaching a bump or other obstacle.
When set to 0 m/s, the robot will come to a complete stop at that point, and you can specify the rotation that the robot should stop at, and any actions to be performed while stopped before continuing.
Linking Trajectory End Behaviors
Often, your robot will need to run multiple trajectories in sequence during an autonomous mode (see the Auto Modes section for information about how to define these sequences in ThunderAuto). To be able to seamlessly transition between trajectories, the end behavior (position and rotation) of one trajectory must match the start behavior of the next trajectory. To make this easy, ThunderAuto lets you link the start/end behavior (position and rotation) of one trajectory to the start/end of another trajectory. When linked, any changes to the start/end behavior of one trajectory will automatically update the linked trajectories to match.
You can edit the start/end behavior links of a trajectory either in the Properties panel under the Trajectory Properties section, or by right-clicking the trajectory in the Trajectories panel and selecting Link Start/End Behavior.
Linking Trajectory Points
You can also link the position of any trajectory points together by right-clicking the point in the Properties panel and selecting Link.
Exporting Trajectories to CSV Files
The simplest way to run ThunderAuto trajectories on your robot is to use ThunderLib to load the ThunderAuto project files directly and provide a simple command-based API for running trajectories. Instead, trajectories can be exported to CSV files from ThunderAuto and loaded onto the robot, where they can be executed using your own trajectory-following code.
CSV Export Settings
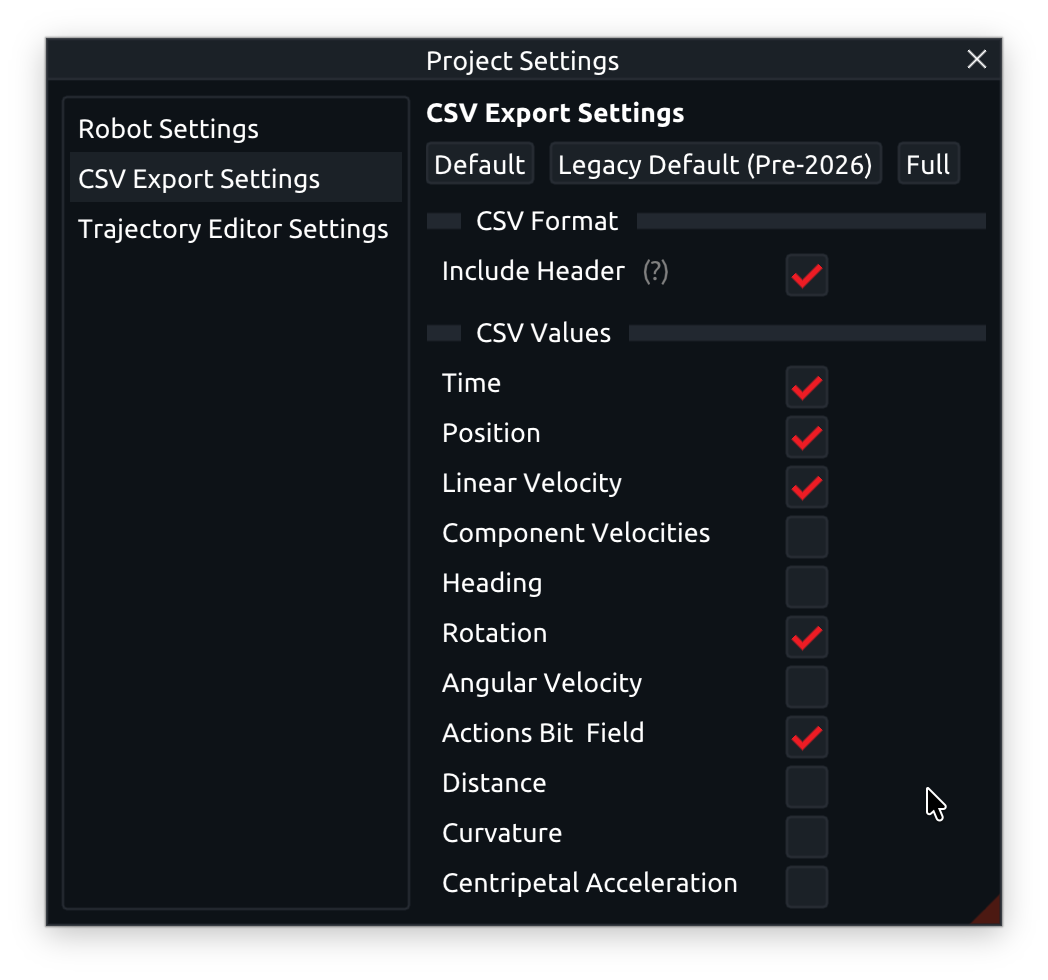
To edit what data is included in the exported CSV files, open the Project Settings window and navigate to the CSV Export Settings tab.
Here you can choose whether to include a header row in the CSV files, as well as which data columns are included.
Exporting Trajectories
To export a single trajectory to a CSV file, select Trajectory > Export to CSV from the top menu bar while the desired trajectory is open in the editor.
To export all trajectories in the project at once, press File > Export All Trajectories to CSV from the top menu bar, or press Ctrl+E.
Exported trajectory CSV files are stored in the same directory as the ThunderAuto project file. Exported CSV files are named <trajectory_name>.csv. CSV files get overwritten without warning each time they are exported.