ThunderAuto
Description
ThunderAuto is a tool used by FRC teams to create efficient trajectories for autonomous robots to follow. Trajectories created in ThunderAuto can be exported to CSV files which can be easily read from the robot program.

ThunderAuto’s code is hosted on GitHub here.
Creating a Project
Select the “New Project” button on the Welcome popup, or use the shortcut Ctrl+N.
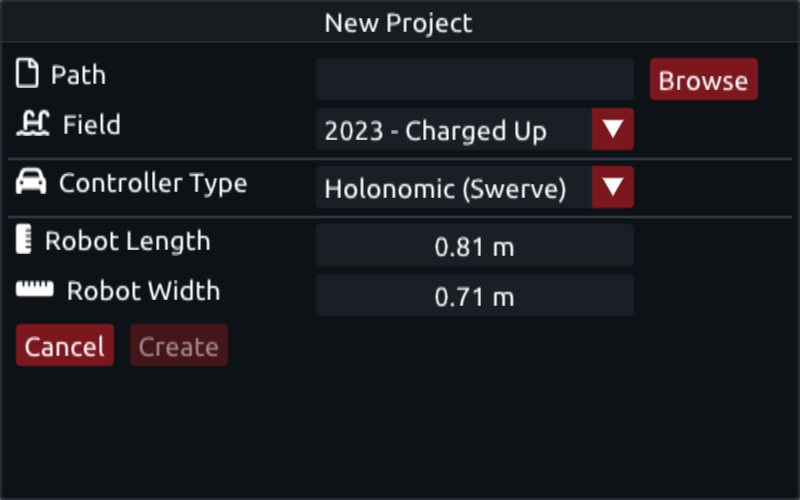
- Path
- The location to save the .thunderauto project and all of the exported .csv files. Somewhere in the deploy folder of the robot project is recommended.
- Field
- Which field to use. The application is updated with each year's game field every year. To import a custom field image, select Custom and choose an image file.
- Controller Type
- The type of drivetrain the robot has. Only Holonomic (Swerve) drivebases are currently supported. Ramsete drivebases coming soon.
- Robot Length
- Length of the robot with bumpers (meters).
- Robot Width
- Width of the robot with bumpers (meters).
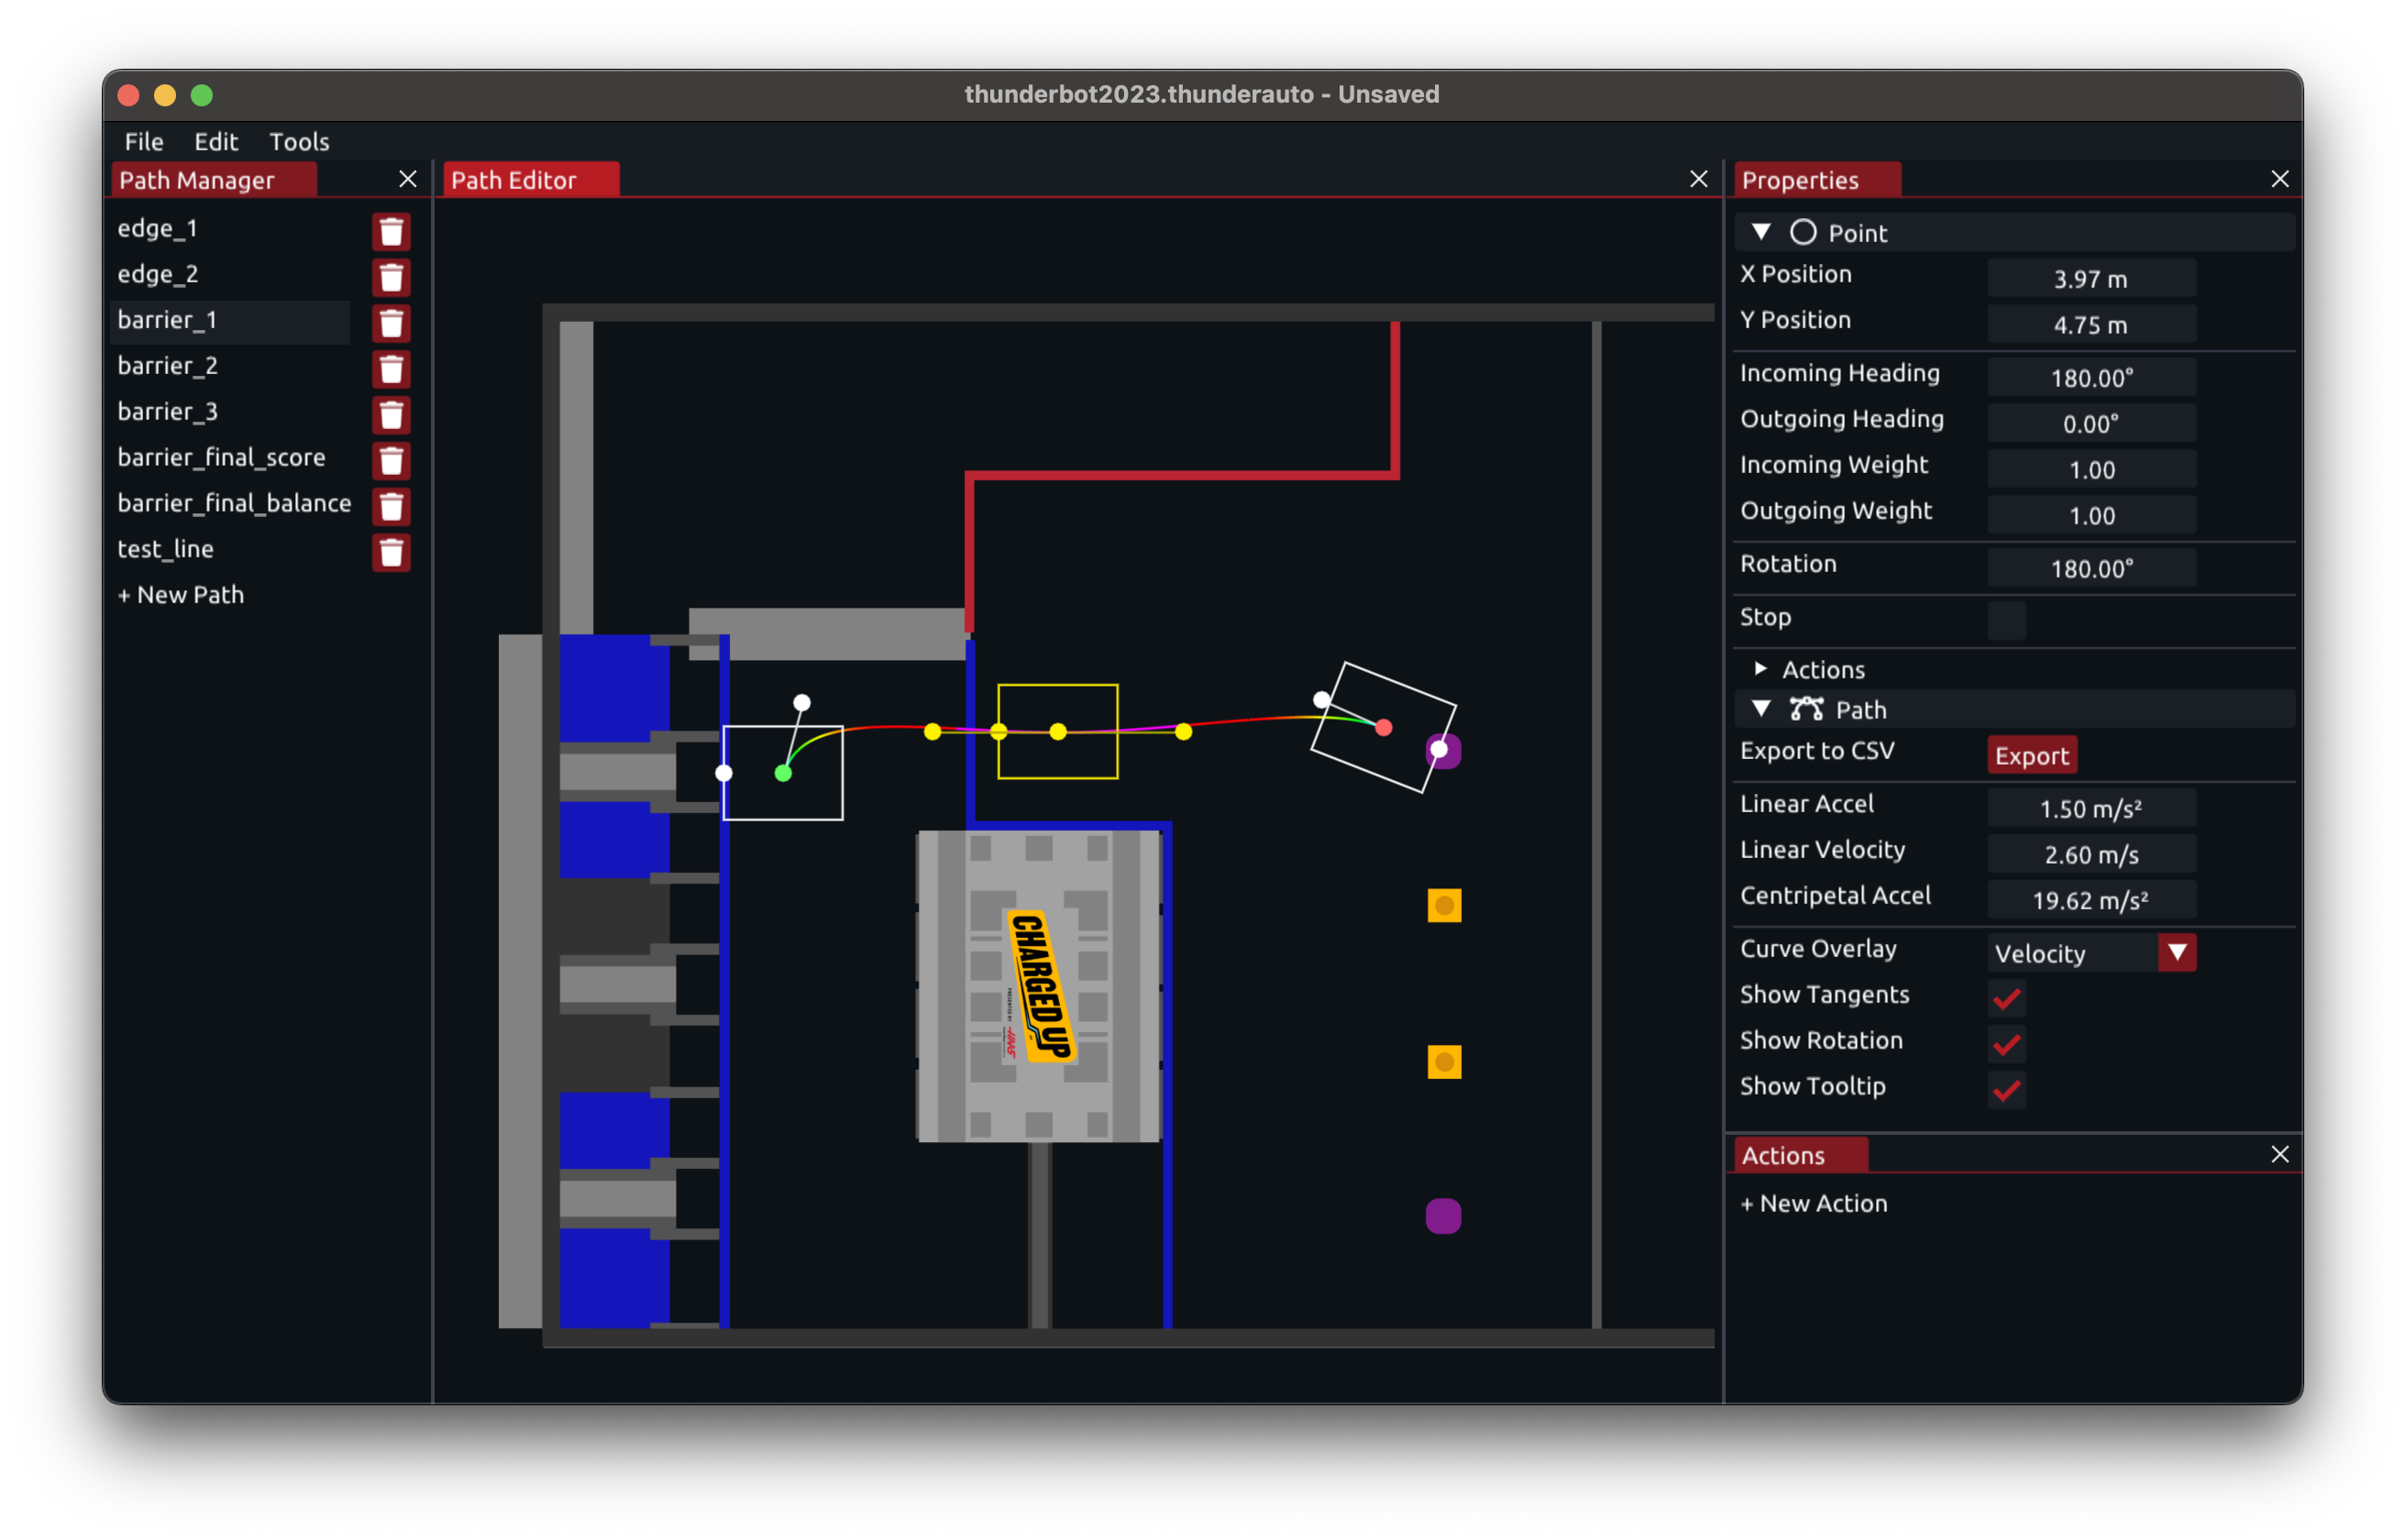
Editing Paths
Navigating The Editor
Pan around with Shift+Left-Click or Middle-Click. Zoom with the scroll wheel.
To reset the view, use the shortcut Ctrl+0, or select View -> Reset View from the top menu bar.
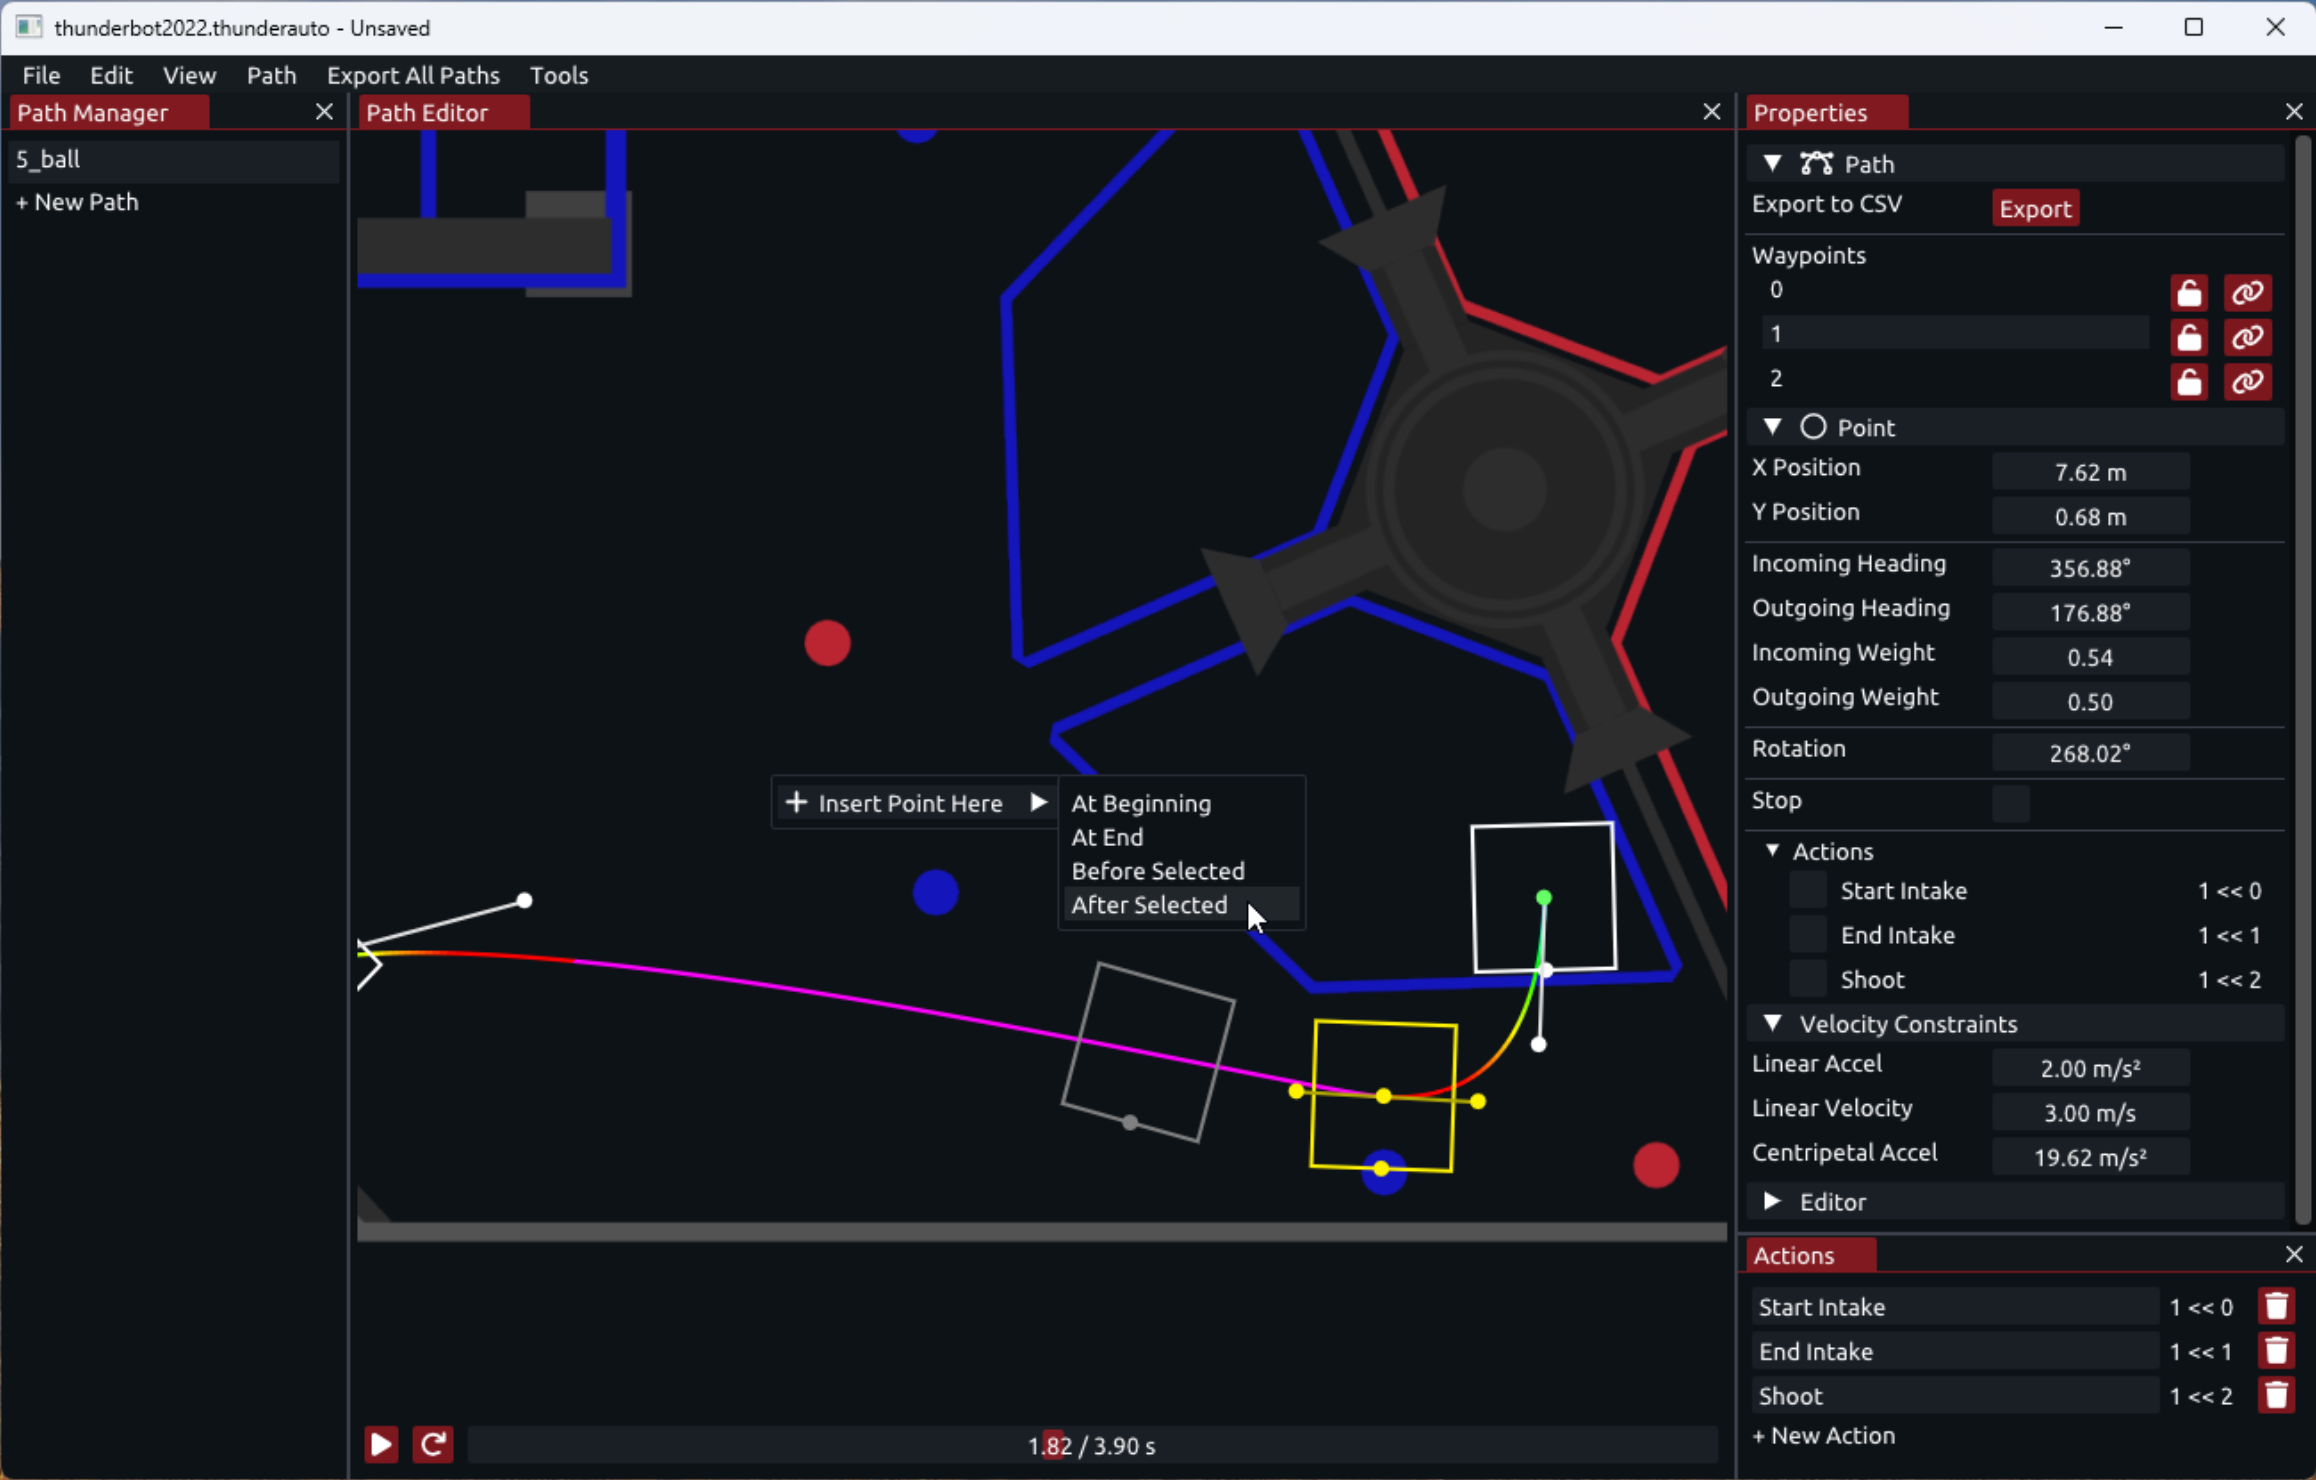
Adding/Removing Points
Ways to add waypoints:
- Right-click anywhere in the editor to open a context menu:
- You may add a point to the start/end of the path, or before/after the currently selected point.
- Double-click the curve to add in a point, or double-click anywhere else to add a point to the closest end of the path.
Ways to remove waypoints:
- Select a point and press the Delete or Backspace key.
- Right-click a point and select Delete from the context menu.
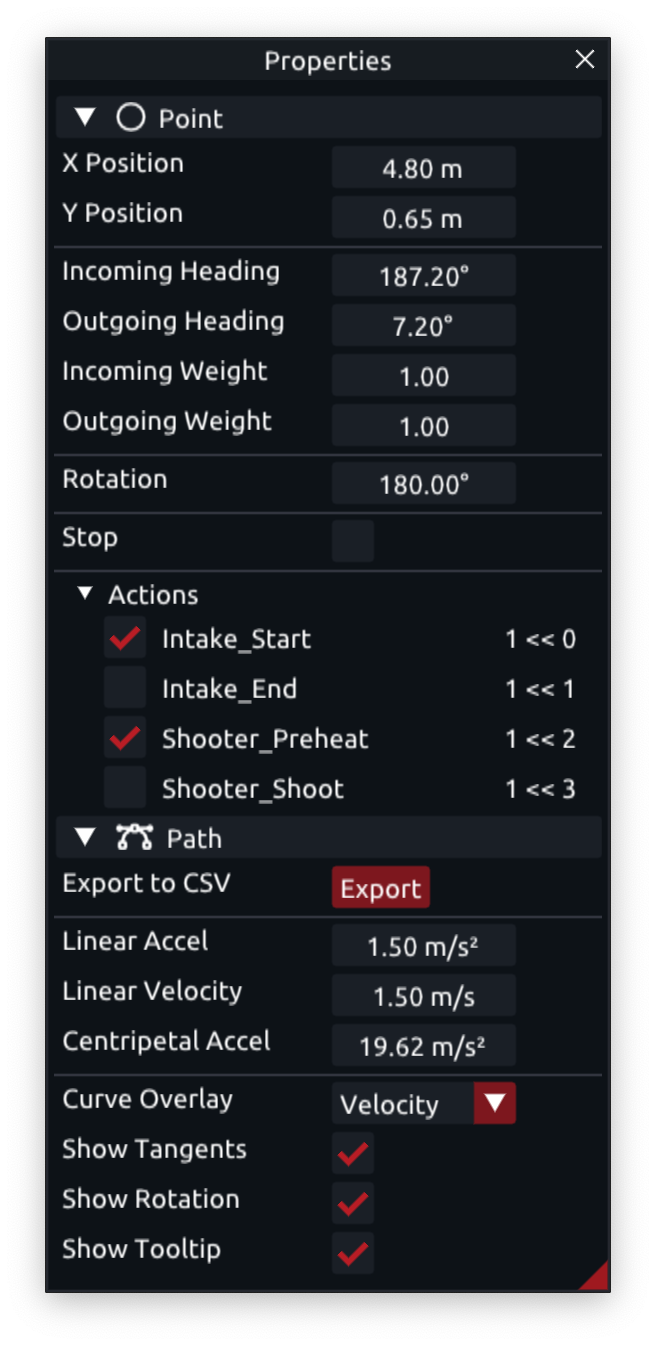
Point Properties

Points can be selected and dragged around in the editor page.
Point properties such as position, rotation, and heading can be manually edited in the Properties page.
If the Stop checkbox is checked, the robot will decelerate to a stop at that waypoint. When stopped, the point’s incoming and outgoing headings can differ.
Linking Points
The position of waypoints can be linked together in the properties page. Open the waypoint link popup by clicking the link icon next to a corresponding waypoint. In the popup, you can create a named link or select an existing link.
Links are useful when creating sequential paths that share endpoints.
Point Actions
Actions can be assigned to waypoints in the Properties page. Actions are simply flags that can be checked on/off for each waypoint. Actions can be used in the robot program to trigger certain behaviors.
Reversing Paths
Reverse a path in the top menu bar, or by right-clicking a path in the path manager page.
Constraints
Constrain the robot’s maximum linear acceleration, linear velocity, and centripetal acceleration in the properties page.
Managing Paths
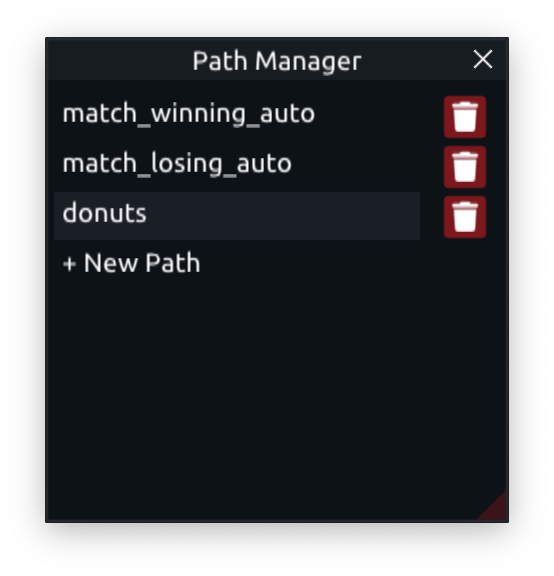 Paths can be created, renamed, duplicated, and deleted in the Path Manager page.
Double-click a path to rename it. Right-click a path to duplicate or delete it.
Exporting Paths
Export individual paths in the Properties page, or export all paths with the menu bar button.
CSV Format
Paths are exported to CSV files in the project’s directory. Each CSV file shares the name of the path it corresponds to.
The CSV file contains the following columns:
- Time (s)
- X Position (m)
- Y Position (m)
- Velocity (m/s)
- Rotation (rad)
- Action (bit field)
For reading the CSV from a robot program, see 1511’s 2023 robot code here.
Building from Source
ThunderAuto uses CMake to generate build files. To build ThunderAuto from source, follow these steps:
- Clone the repository
git clone https://github.com/frc1511/ThunderAuto cd ThunderAuto - Update submodules
git submodule init git submodule update -
Configure the project
For Windows, ThunderAuto supports both DirectX11 and OpenGL backends. DirectX11 is the default, but you can switch to OpenGL by setting the
TH_OPENGLCMake option toON.cmake . -B build - Build the project
cmake --build build