Homer’s Dashboard
Description
Homer’s Dashboard is a custom dashboard used to interface with 1511’s robots. It was created during the 2022 offseason and was originally designed only for Homer, but it has since been expanded for all competition robots. The dashboard is updated every year to fit the specific needs of each year’s robot.
The code for Homer’s Dashboard is hosted on GitHub here.
Installation
You can download the latest release from the GitHub releases page. The dashboard is a standalone executable, so it can be run from anywhere on the computer.
On the releases page you will find multiple builds for different operating systems and architectures.
There’s a posibility that you might need to install Bonjour print services on Windows if the dashboard can’t resolve multicast DNS addresses.
OpenCV vs Non-OpenCV Builds
For each platform there should be an OpenCV and a non-OpenCV build. The OpenCV build will require OpenCV to be installed on the system.
OpenCV is required for the camera pages, so if you don’t need the camera pages, you can use the non-OpenCV build. The non-OpenCV build is also smaller in size and should run marginally faster.
How to Install OpenCV (Windows x64)
- Download the latest OpenCV release from their GitHub releases page.
- When the installer prompts you to select a location to extract OpenCV to, select
C:\Program Files\opencv\. - Then, add
C:\Program Files\opencv\build\x64\v15\binto the path environment variable.
Launch the Dashboard Automatically from Driver Station
To make the FRC Driver Station automatically open the dashboard, edit the DashboardCmdLine entry in C:\Users\Public\Documents\FRC\FRC DS Data Storage.ini with the path to the dashboard executable.
Pages
Camera Stream Pages
In OpenCV builds, the dashboard contains camera stream pages for cameras connected to the robot. If any of the camera streams fail to load, the view will present “🤯 No Camera”.
The Limelight camera page displays the camera stream at http://limelight-homer.local:5800/stream.mjpg named “limelight”.
The Intake camera page displays the camera stream at http://roborio-1511-frc.local:5800/stream.mjpg named “intake_camera”. It’s named intake camera because that’s what it was in 2022, and we want to maintain compatibility. You can use it for any camera on the robot you want, just make sure to name it “intake_camera”.
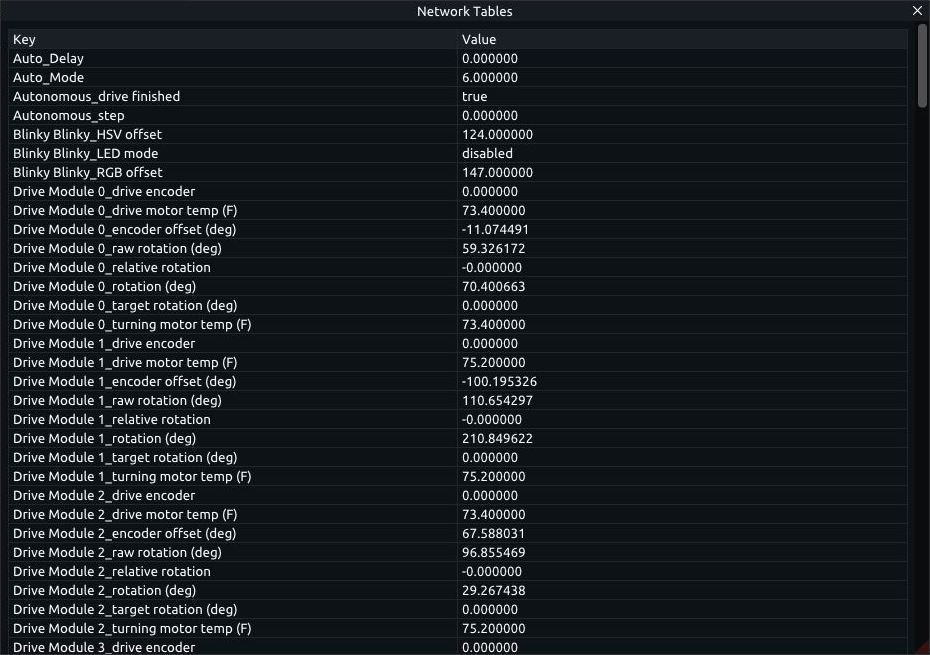
Network Tables Page
The Network Tables page presents a list of key-value pairs from the robot’s network tables. Subtables are collapsible and expandable. The values are updated continuously and are read-only.
Auto Chooser Page
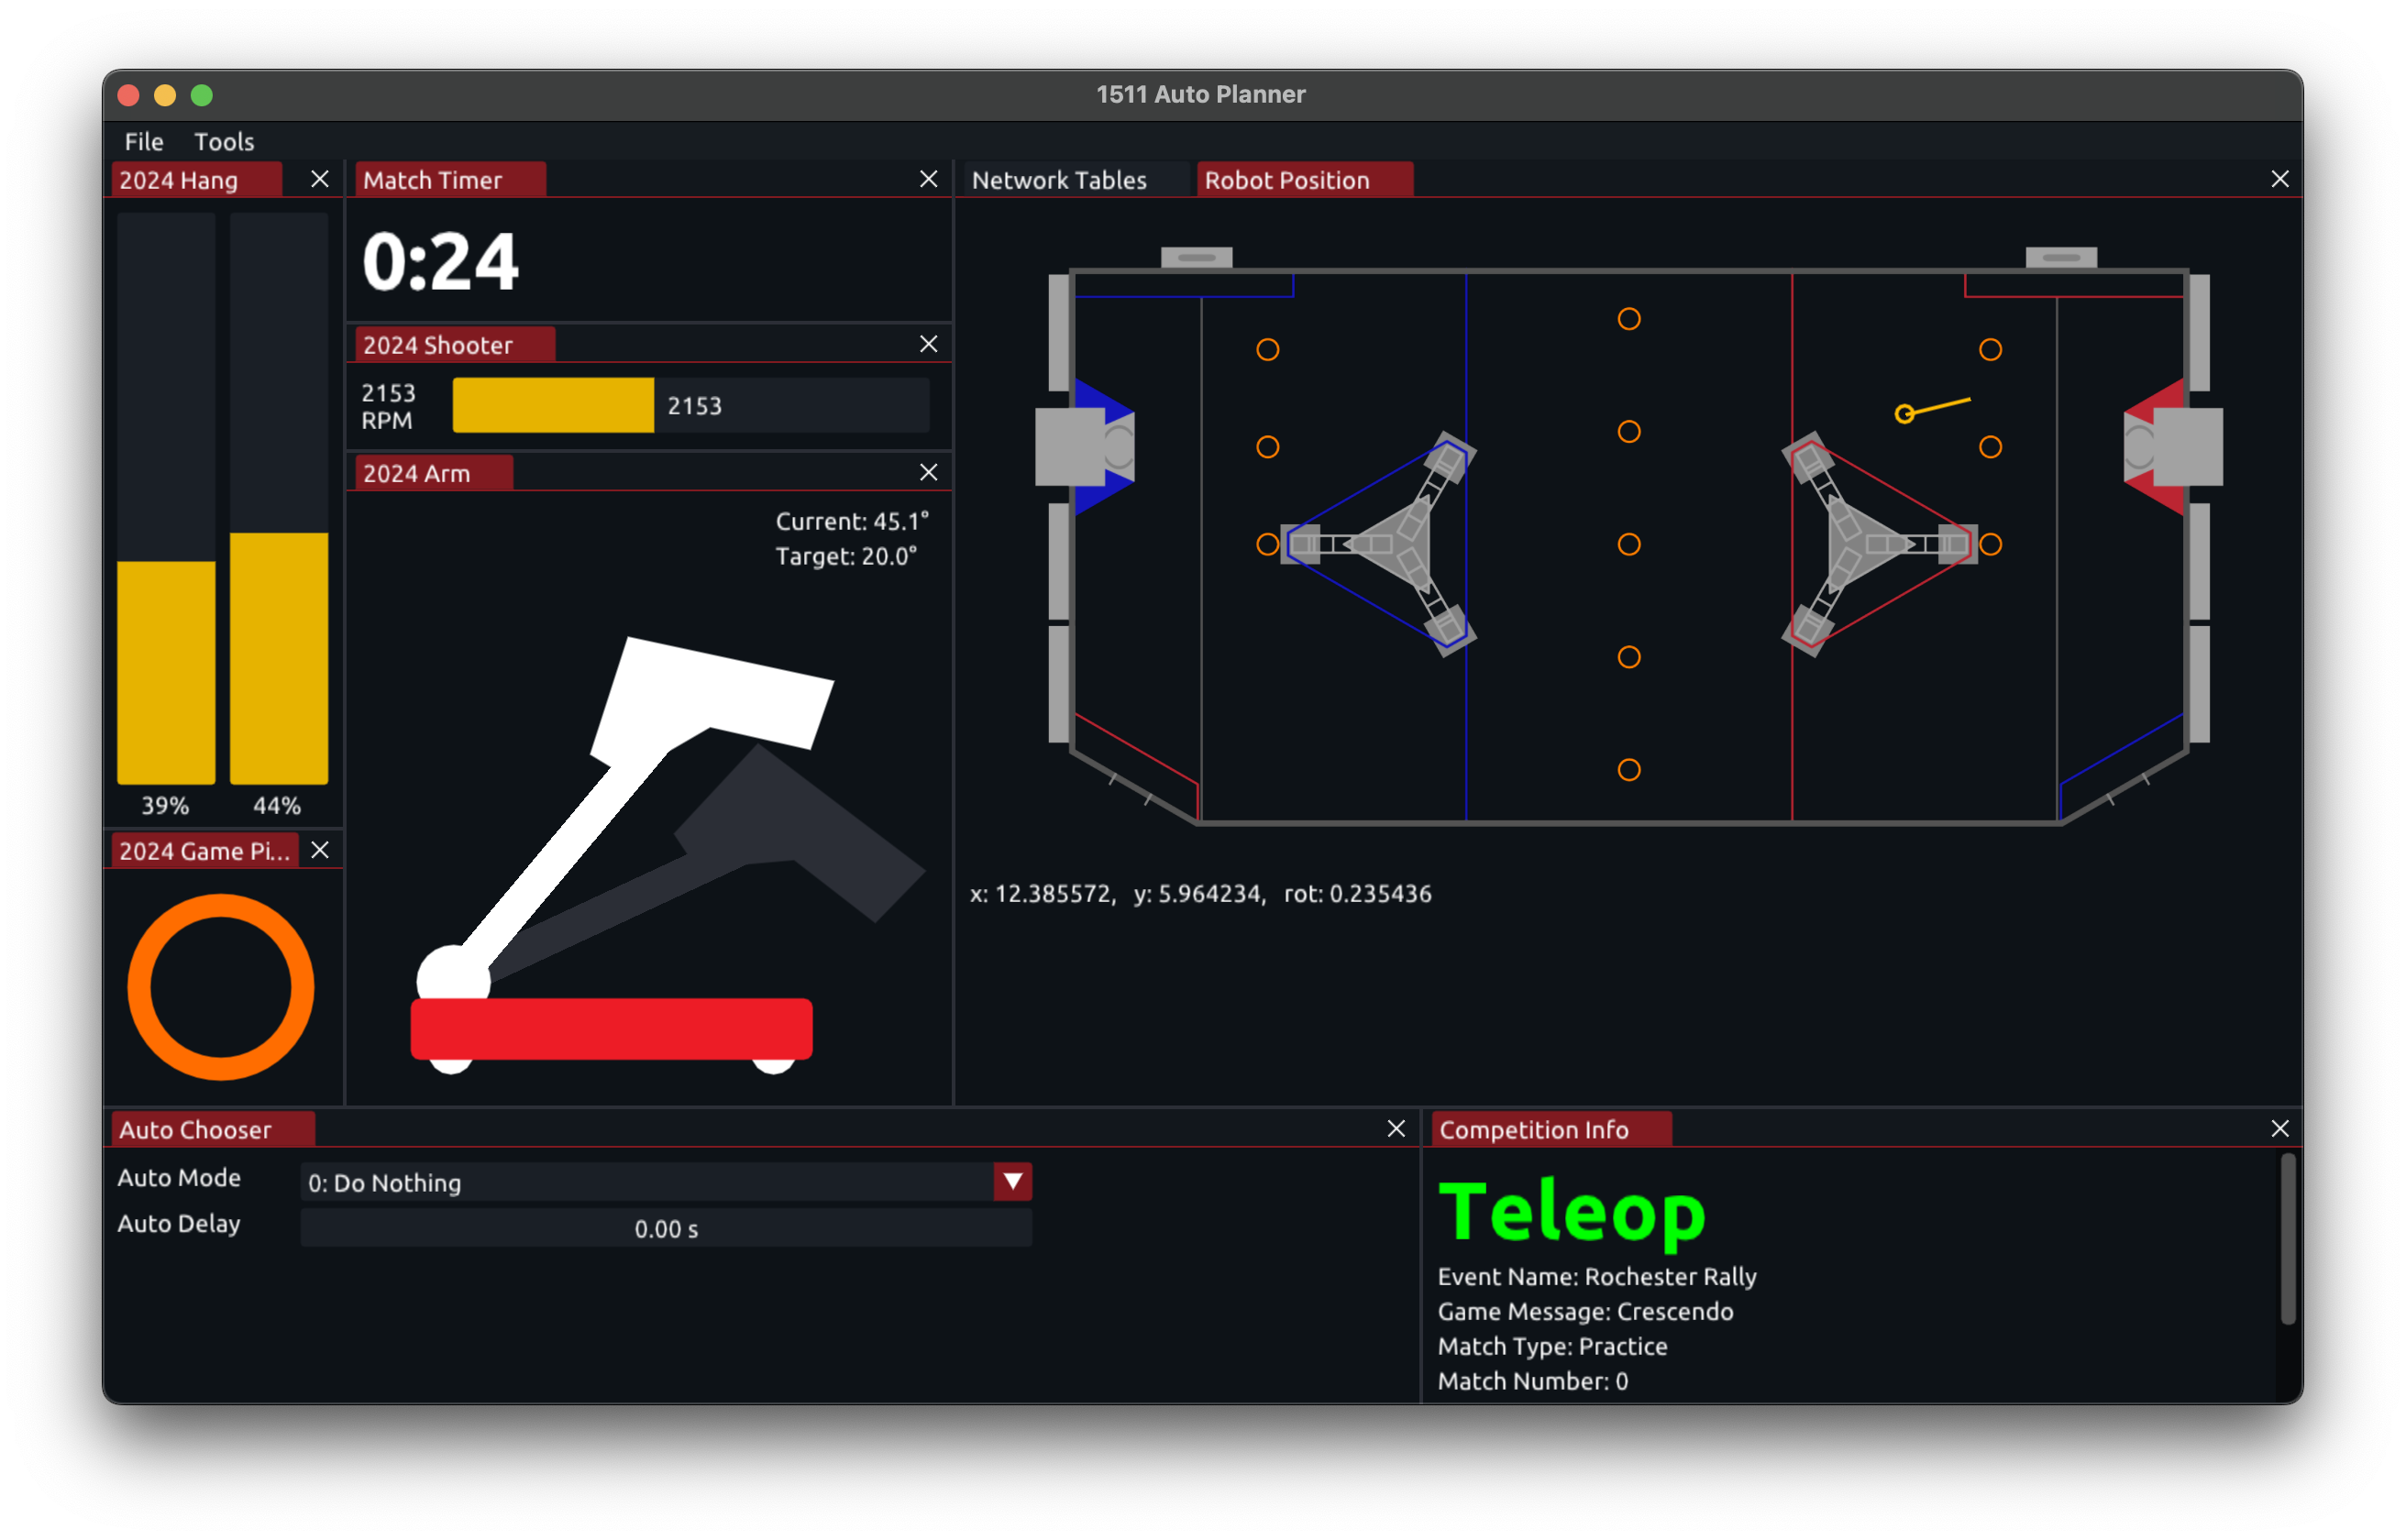
The Autonomous chooser page allows the user to select an Autonomous mode to run.
The “Auto Mode” dropdown displays the available options for autonomous modes (sent from the robot). When the user selects an autonomous mode, the page sets the SmartDashboard network table value Auto_Mode to the selected autonomous mode index. When no autonomous modes are available, the page sets Auto_Mode to 0. Make sure the mode at index 0 does nothing!
The “Auto Delay” slider allows the user to set the delay time before the autonomous mode starts (in seconds). The page sets the SmartDashboard network table value Auto_Delay to the configured delay time.

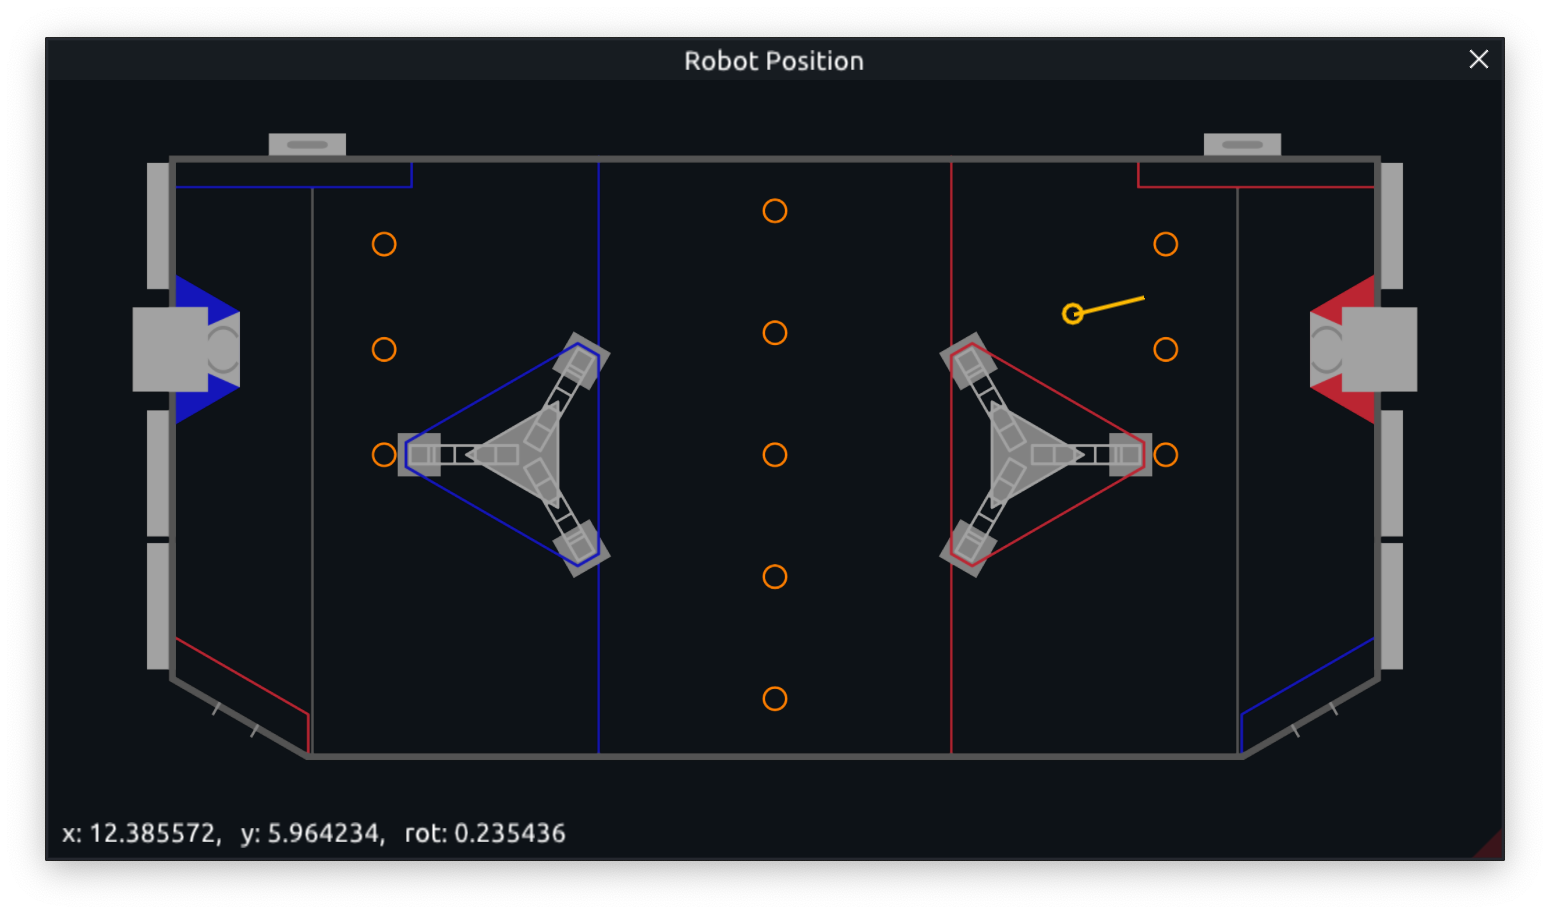
Robot Position Page
The Robot Position page displays the year’s field image and the robot’s position and orientation. The robot’s position is set by the thunderdashboard_drive_x_pos and thunderdashboard_drive_y_pos SmartDashboard network table values, and the robot’s orientation is set by the thunderdashboard_drive_ang.
Competition Info Page
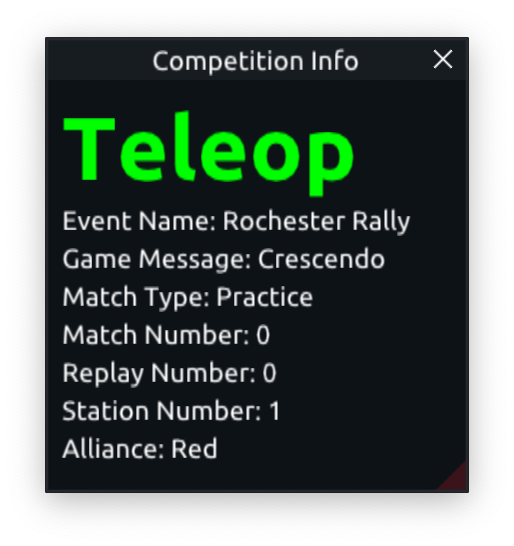
The Competition Info page reads data from FMS and displays it. The page displays the current mode (Disabled, Teleop, Autonomous, etc.) in big text. It also displays the Event Name, Game Message, Match Type, Match Number, Replay Number, Station Number, and Alliance Color.
2024 Arm Page
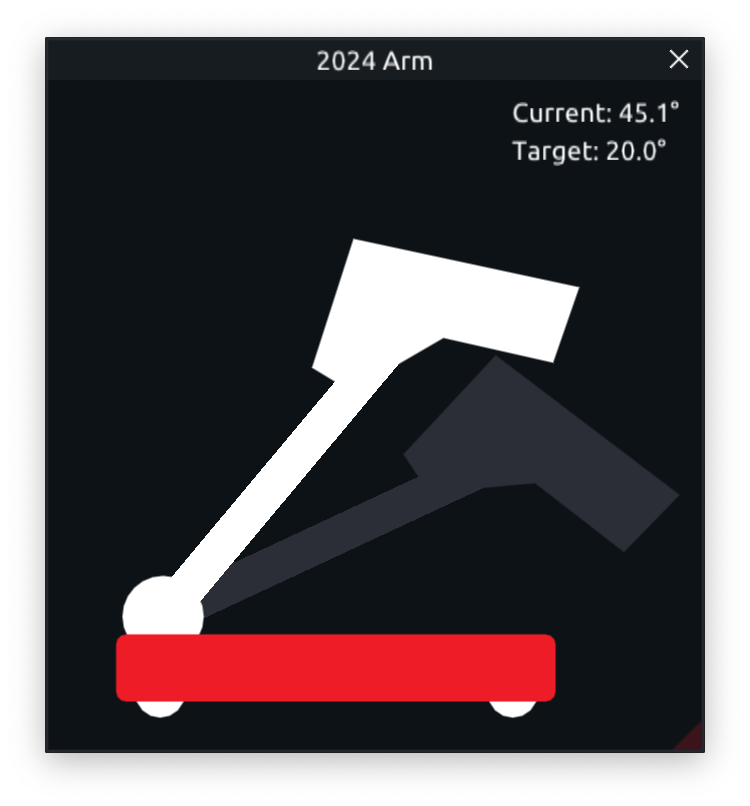
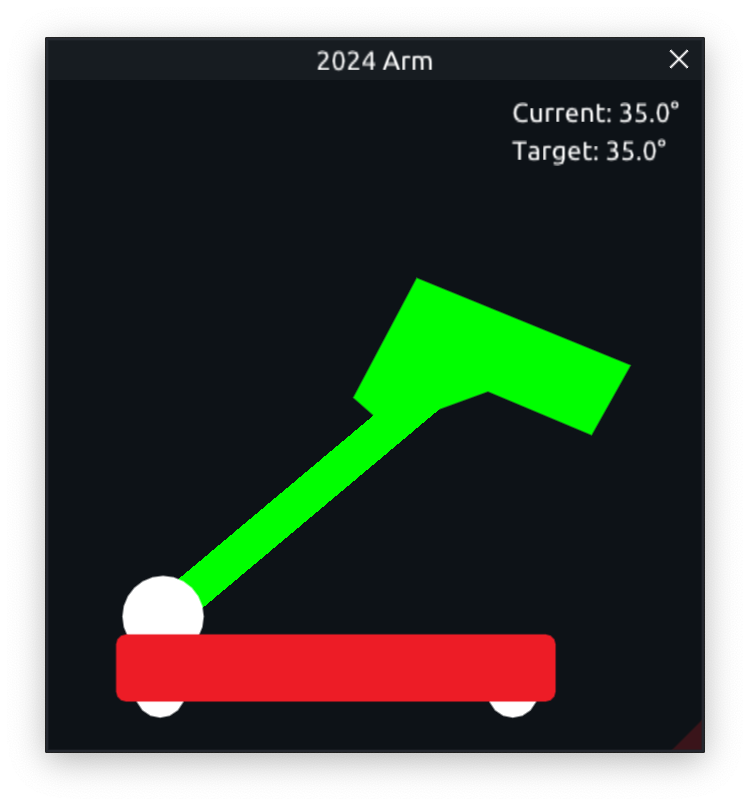
The 2024 Arm page displays the current and target angles of the robot’s arm.
The current angle is read from thunderdashboard_2024_arm_pivot_deg and the target angle is read from thunderdashboard_2024_arm_pivot_target_deg. These values should range from 0-85 degrees (the range of motion of the arm). Set the target angle to -1 to disable the target angle display.
If the current angle and target angle are close enough, the page will display the arm as green. Otherwise, the current angle will display as white and the target angle will display as gray.
The bumper colors of the robot in the visualization will change depending on the alliance read from the FMS.
2024 Hang Page
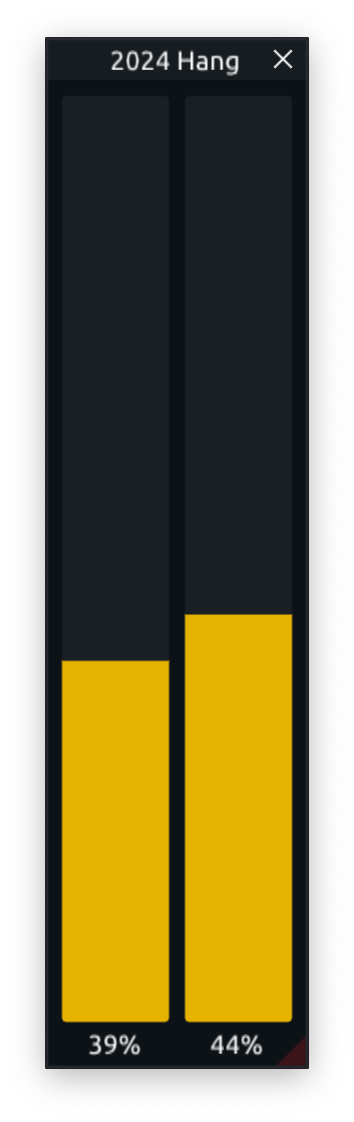
The 2024 Hang page displays the extension of each hang arm.
The page reads the value of thunderdashboard_2024_hang_left_percent and thunderdashboard_2024_hang_right_percent and displays the extension of each arm. The values should range from 0-1.
2024 Game Piece Page
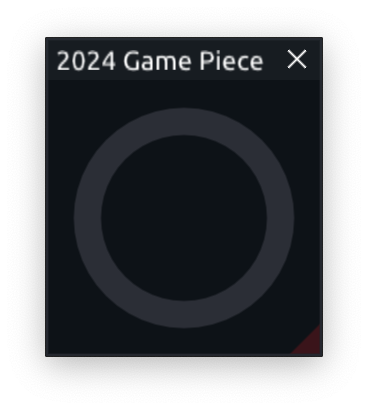

The 2024 Game Piece page displays whether the robot as a note.
The page reads the value of thunderdashboard_2024_has_gamepiece and displays an orange note if the value is true, and a gray note if the value is false.
Building from Source
Supported operating systems are Windows and macOS.
First, clone the repository and initialize the submodules.
git clone https://github.com/frc1511/HomersDashboard.git
cd HomersDashboard

git submodule init
git submodule update
Configure
Homer’s Dashboard uses CMake to generate build projects for different platforms.
There are a number of options that can be set when configuring the build:
HD_WITH_CS- Whether to build with the camera server and OpenCV. Default isON.HD_DOWNLOAD_WPILIB- Whether to download and link to pre-built wpilib libraries instead of building them from source. Default isOFF. (Note: If this is set on Windows, you can’t build in Debug mode, only Release or RelWithDebInfo because the pre-built libraries were built in Release mode).HD_DOWNLOAD_WPILIB_VERSION- The version of the pre-built wpilib libraries to download (default is2024.3.1).HD_DOWNLOAD_WPILIB_ARCH- Manually set the architecture of the pre-built wpilib libraries to download. If not set, the architecture will be detected automatically based on the host system (this option is only useful if you’re cross-compiling).
For Windows, add the flag -G "Visual Studio 17 2022" to the cmake configuration to generate a Visual Studio solution. Add the -A x64 or -A ARM64 flag to specify the architecture.
For macOS, add the flag -G "Xcode" to the cmake configuration to generate an Xcode project. “Unix Makefiles” will also work.
cmake . -B build -G "Visual Studio 17 2022" -DCMAKE_BUILD_TYPE=Release -DHD_WITH_CS=OFF -DHD_DOWNLOAD_WPILIB=ONBuild
Either open the generated solution/project in the native IDE and build from there, or build from the command line:
cmake --build buildAll the app’s resources (Images, Fonts, etc.) are built into the executable, so there’s no need to worry about moving them around once it’s built.
Creating a Page
To create a page in the dashboard, start with the following template header and cpp files.
// HomersDashboard/pages/2024/my_page.h

#pragma once

#include <HomersDashboard/nt_handler.h>
#include <HomersDashboard/pages/page.h>

namespace y2024 {

class MyPage : public Page {
  NTHandler& m_nt_handler;

public:
  MyPage(NTHandler& nt_handler)
    : m_nt_handler(nt_handler) {}

  const char* name() const override { return "Page Name"; }
  void present(bool* running) override;
};

} // namespace y2024
// HomersDashboard/pages/2024/my_page.cpp
#include <HomersDashboard/pages/2024/my_page.h>
using namespace y2024;
void GamePiecePage::present(bool* running) {
ImGui::SetNextWindowSize(ImVec2(500, 500), ImGuiCond_FirstUseEver);
if (!ImGui::Begin(name(), running,
ImGuiWindowFlags_NoCollapse | ImGuiWindowFlags_NoScrollbar |
ImGuiWindowFlags_NoScrollWithMouse)) {
ImGui::End();
return;
}
// Page content goes here...
ImGui::End();
}Add the name of the cpp file to the /src/pages/CMakeLists.txt file to add it to the build.
Now you can just add the page to the dashboard in the app.h by creating an instance of the page, and adding a pointer to it to the m_2024_pages set and the m_all_pages set.