Creating a Project
To create a robot project in WPILib VS Code, follow the steps listed below.
First, click the WPILib icon in the top right corner of WPILib VS Code and search for “Create a new project” in the command palette.

Then you should see the “New Project Creator Window”
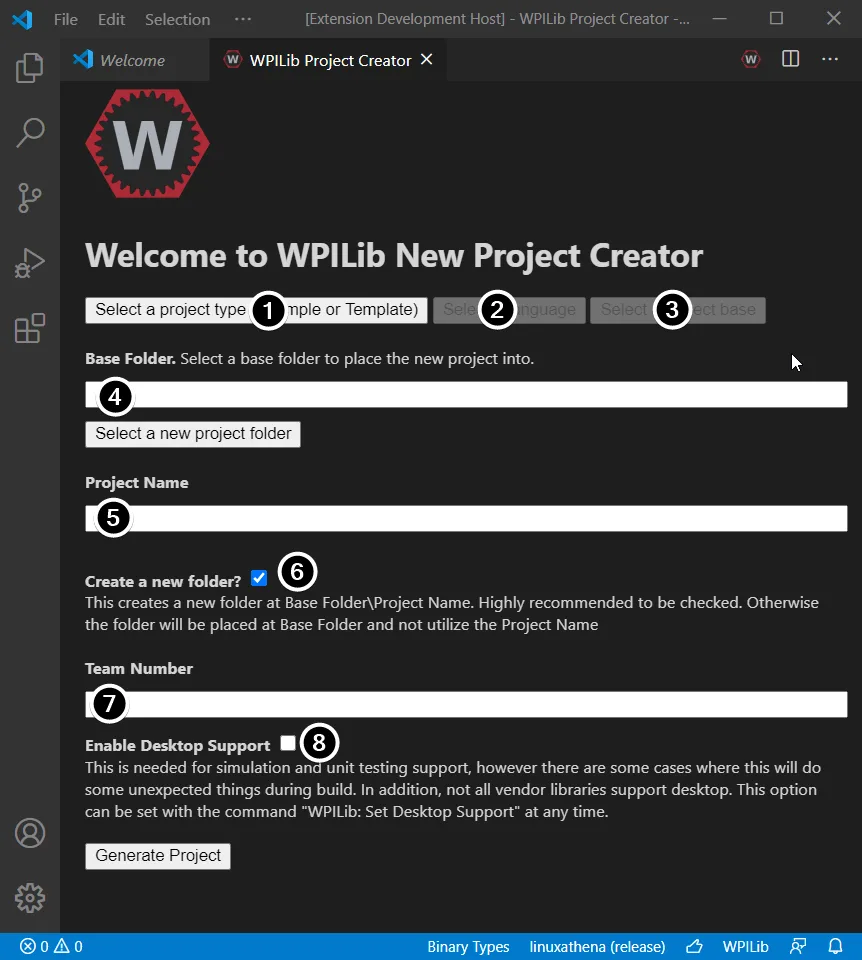
- Project Type: This is the type of the project. Select “Template”.
- Language: This is the programming language of the project. We always use “C++”.
- Project Base: This is template that the project will be based on. We use “Timed Robot”.
- Base Folder: The folder on the computer where the project will be stored (ex. Documents folder).
- Project Name: The name of the project (ex. Homer or thunderbot2023).
- Create a New Folder: Select this if you want it to create a new folder named
Project Namein theBase Folder(You usually do). - Team Number: The team number (1511 unless you’re a traitor).
- Enable Desktop Support: This is for simulating the robot code on your computer. I’ve never used it, and you probably won’t either, so just leave it unchecked unless you’re feeling adventurous. (I’ve seen this break some builds because not every library works with desktop support).
Once all the fields have been configured, click “Generate Project” and the project will be created. VS Code should then prompt you to open the project.