Configuring a Device’s CAN ID
CAN devices on the robot’s CAN bus must be configured with a unique CAN ID. Unlike other motors and sensors, CAN devices are not plugged directly into an identifiable port on the RoboRIO. Instead, they are linked together in a long “CAN Bus” (yellow and green wires connecting each device), so they must be configured with a unique ID so that the RoboRIO can identify them. Depending on the vendor of the device, the process for configuring the CAN ID may differ. Devices made by REV Robotics (ex. SparkMax Motor Controllers) require the REV Hardware Client to be installed on the computer configuring the device, and devices made by CTR Electronics (ex. TalonFX Motor Controllers, CANCoders) require the CTRE Phoenix Tuner. You can jump to the section for your device’s vendor below.
REV Robotics
- Make sure the most recent version of the REV Hardware Client is installed on the computer you are using to configure the device.
- Connect the device to the computer using a USB cable.
- SparkMax Motor Controllers come with an orange USB-C to USB-A cable for this purpose.
- Open the REV Hardware Client, or scan for devices if it is already open.
- Occasionally, scanning for devices will not work. If this happens, close the REV Hardware Client and reopen it.
- Select the device you want to configure from the list of devices.
- Under the “Basic” tab, change the “CAN ID” field to the desired CAN ID, then click “Save Configuration”.
- You can also change a number of other configuration settings, such as inversion, motor type, etc. These settings can also be changed in the code, so it is not super important to configure them here. If you do change them here, make sure to click the “Burn Flash” button to save the changes to the device’s flash memory.
CTR Electronics
- Make sure the most recent version of CTRE Phoenix Tuner is installed on the computer you are using to configure the device.
- Turn on the robot and connect the roboRIO to the computer using a USB-B to USB-A cable.
- Open the CTRE Phoenix Tuner and select “RoboRIO Over USB” from the “Diagnostic Server Address or Team Number” dropdown menu, and make sure the “Port” field is set to 1250.
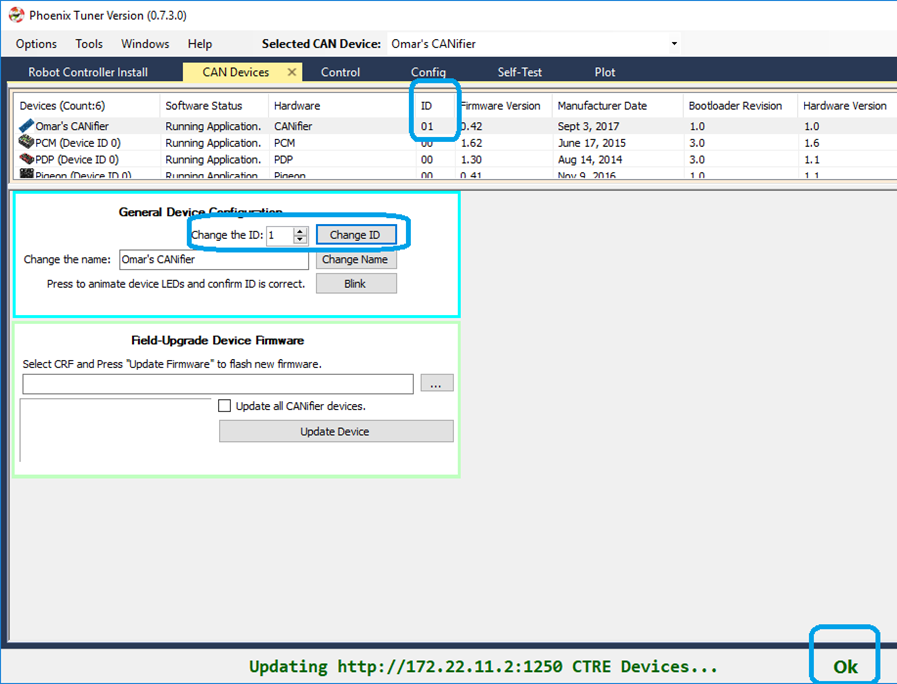
- Select the “CAN Devices” tab, then click the device you want to configure.
- Modify the “Change the ID” field to the desired CAN ID, then click “Change ID”.

